Import Transactions Via CSV
This guide is tailored to Idaho and Utah broker users
Introduction
Quick 8 Min Tutorial:
Important:
Depending on the type of user you are (Idaho/Utah user, Filing Services® user, or Connect® user) the import screen and navigation might be slightly different in the video recorded above. However, the bulk of the functionality is identical. A few of the nuanced differences are described below.
Rather than manually submitting policy transactions through InsCipher's tax calculator wizard, you can import a batch of transactions by saving a spreadsheet file with unique headers as a CSV file. Afterward, follow the steps below to import the policy transactions.
1. Download policy details
Download a policy details report from your policy management software and convert this file to a .csv format (not to be confused with .csv (UTF-8) format). Many policy management systems allow for the exporting of policy details reports to a .csv file.
However, some may not, and it may be required to convert the report from a .xls(x) format to a .csv format using a program like MS Excel. Regardless, to proceed to the next step, you will need to ensure that the file format is saved as a .csv.
Note:
Previously, it was required that you would use our sample file in order to import policy transactions into the InsCipher portal. This is no longer required! You may still utilize this same file, should you already have a process built out for this. Download the sample file by clicking here. Descriptions of the headers can be found in the sample file.
2. Navigate to the Batch Import Screen
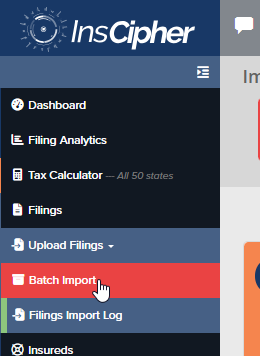
Use the left navigation to select Upload Filing > Batch Import
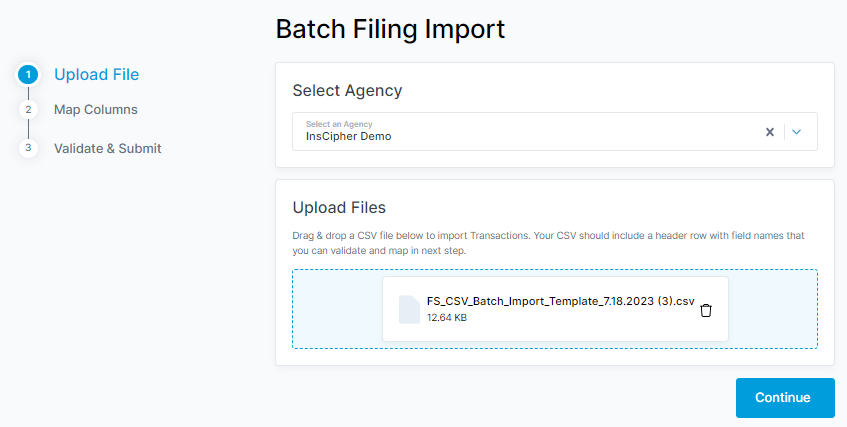
On step 1 of the CSV import process, you first select your Agency and then drag-and-drop OR select your saved .csv file into the file upload box. Once this is attached, then click "Continue" to proceed to Step 2 - Map Columns.
4. Map columns
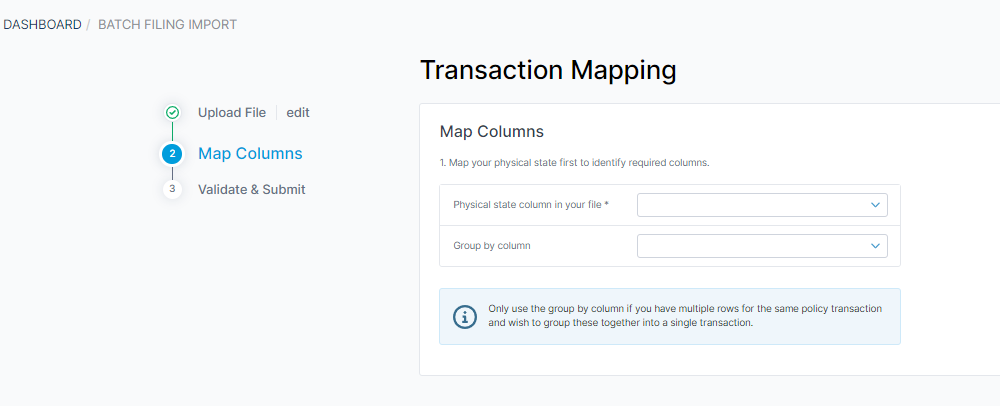
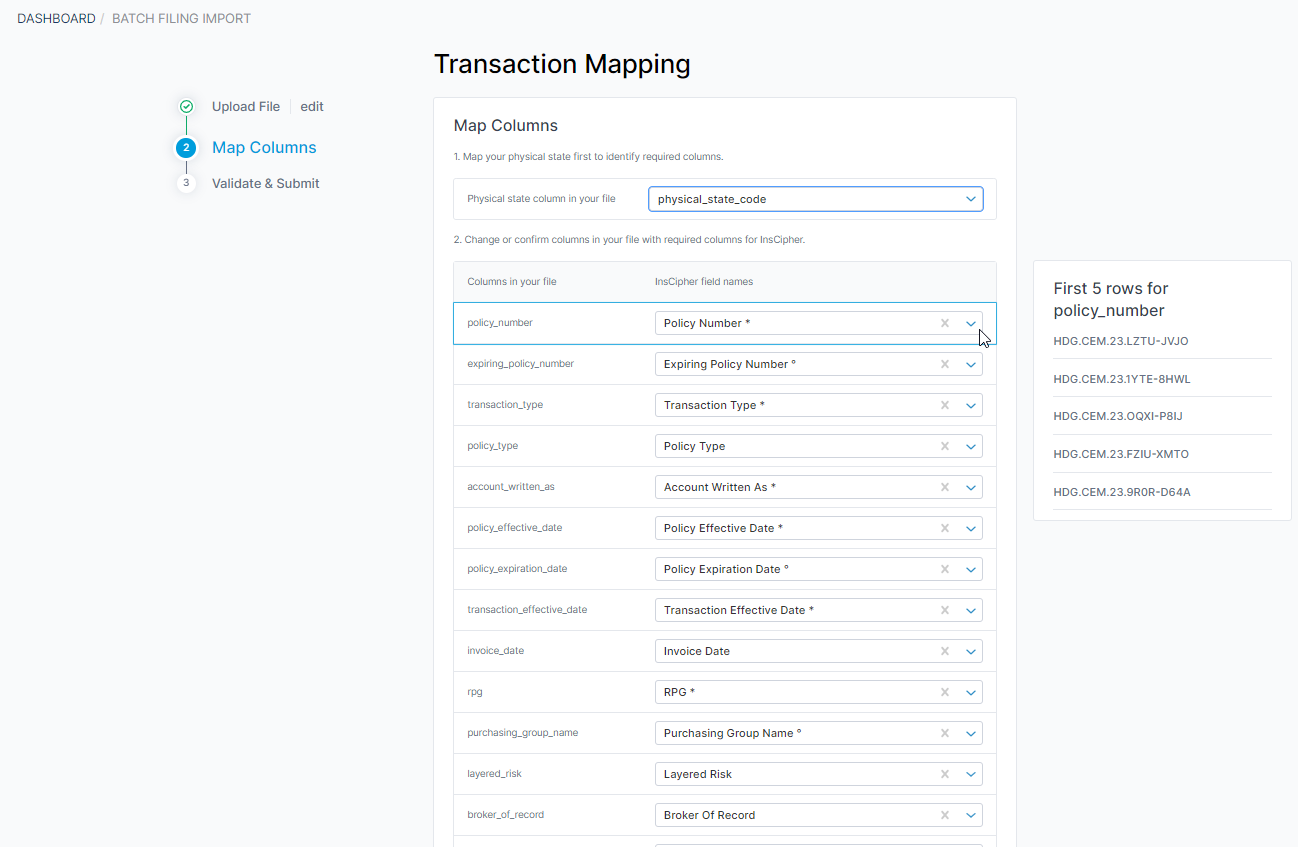
In step 2 of the CSV import process, you will need to map the columns from your policy transaction report to the required headers in the InsCipher portal.
Select the column that contains the physical/risk state of the policy transactions. If you use our import sample file, this will be called "physical_state_code". However, if you are using your own custom file from your agency system it may be called something different.
Should you be using a file that has multiple rows for the same transaction, you can also use the option to "Group By Column". If your policy details for a single transaction are on one row, then leave these values blank.
Next, map all the remaining headers in your file.
Note:
The nice thing about this feature is that we save the mappings you perform on this step so the next time you attempt to import transactions, the mapping will already be done for you!
This new batch import process allows for CSV files with multiple rows or multiple columns.
a. Multiple Row CSV example:

Note:
In this example, you would choose the Group By Column value = "Invoice #"
b. Multiple Column CSV example:
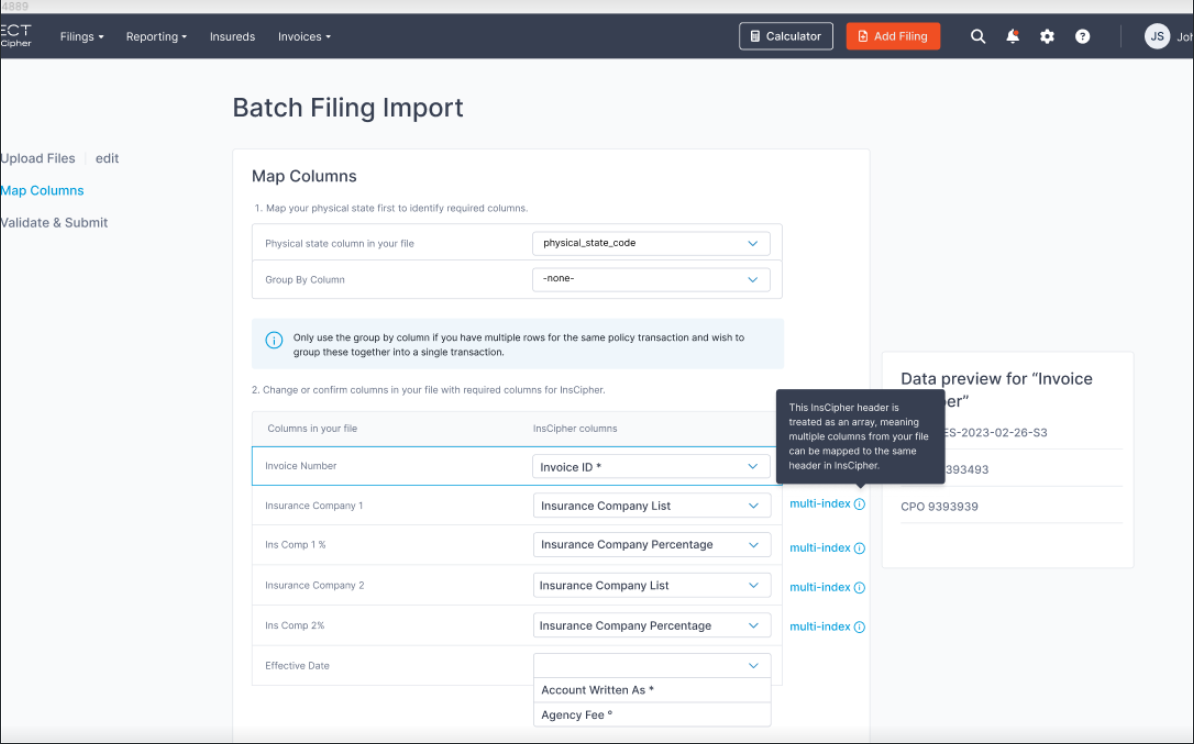
A summary is then provided at the bottom of the page. If you don't wish to map optional columns, then these values will not be imported.

Important:
You must map all required columns in order to proceed to the next step. Required columns are listed here. All other columns are optional but there are certain ones that are recommended for the data to be complete for a given transaction (everything that is needed to file in a state). Click on the "Don't import data in unmapped columns" if you wish to bypass mapping all columns in your file.
Best practices:
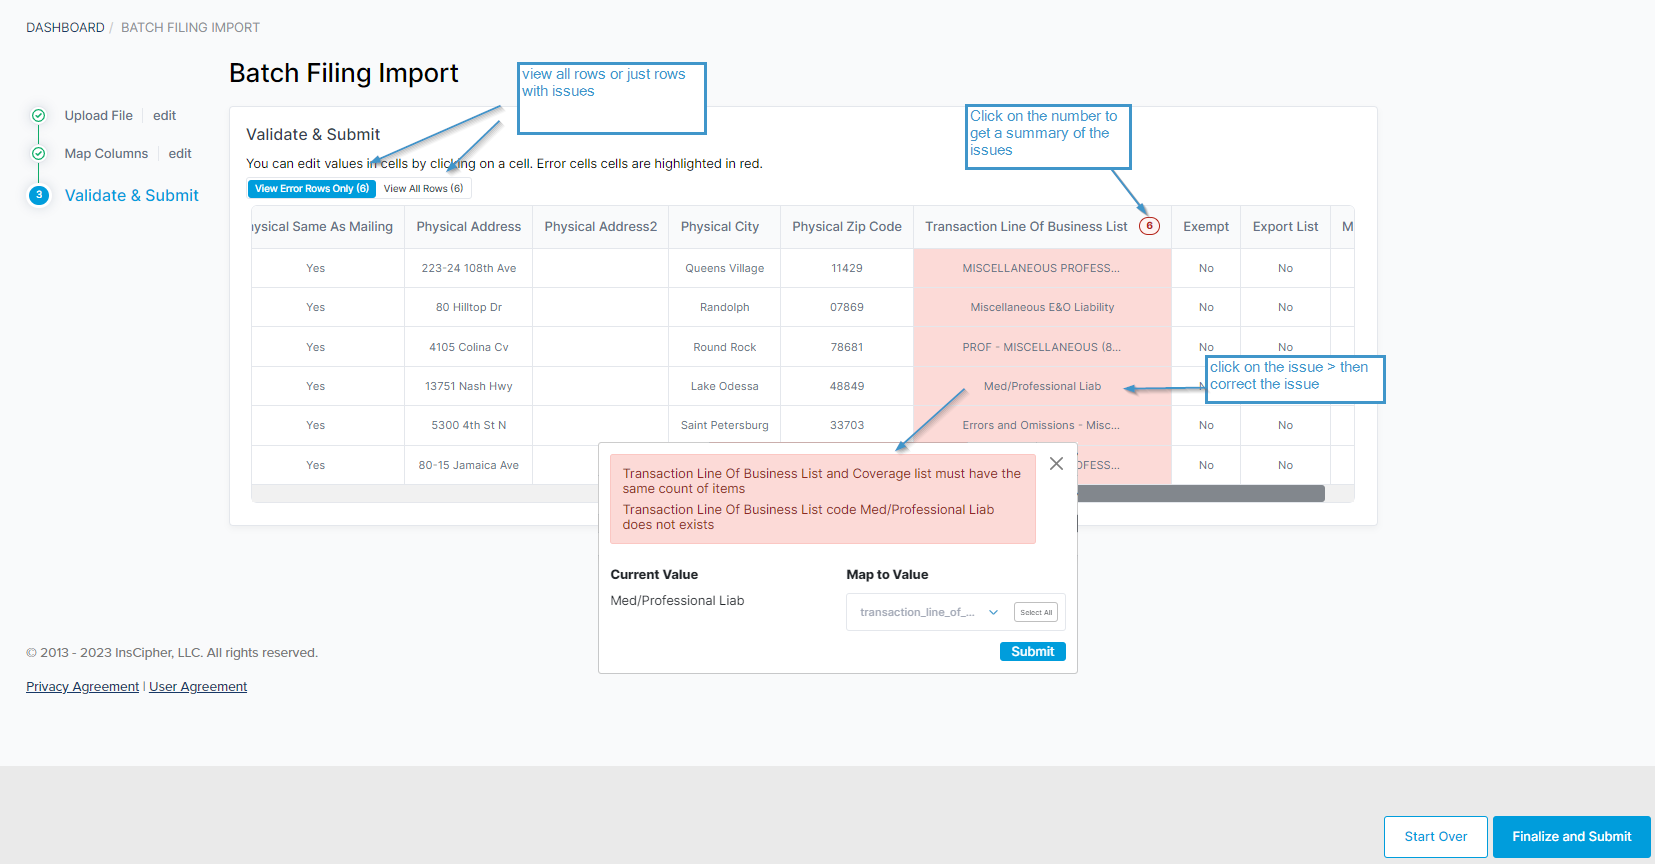
- Click on the number on the column headers that contain issues to get a summary of the issues.
- Look for patterns. If there are errors that apply to multiple rows, use the "Select all" option to apply to all affected rows when fixing a specific issue/field.
- Should there be a lot of errors that make it difficult to proceed, consider fixing your underlying file and starting over.
- If you have questions about the header descriptions or accepted values, refer to the table here. Step 3 requires you to do a review and correct data on any rows that have errors.
- If you are just importing a CSV, after you click "Continue" your file will be scheduled for import. Should you have any import errors, these will be displayed on the "Filings Import Log".
Updated 3 months ago

