
Import Policy Data
Once you have added the integration setup tool to your agency, you can start the setup wizard to connect your Concept One database to InsCipher to start importing policy data.
Steps in completing the Integration
To fully connect your agency's Concept One database to InsCipher to start importing policy data, you will need to complete a series of 4 steps within the InsCipher Integration Tool.
To turn on the integration functionality
To begin, you will first need to log into your Connect® account. Click on the Settings cog in the top right navigation bar > “Integrations” > then click on the “ADD NEW” button to start the Integration Wizard. This wizard guides you through a 4-step process of installation. Select Concept One from the dropdown to add the integration.
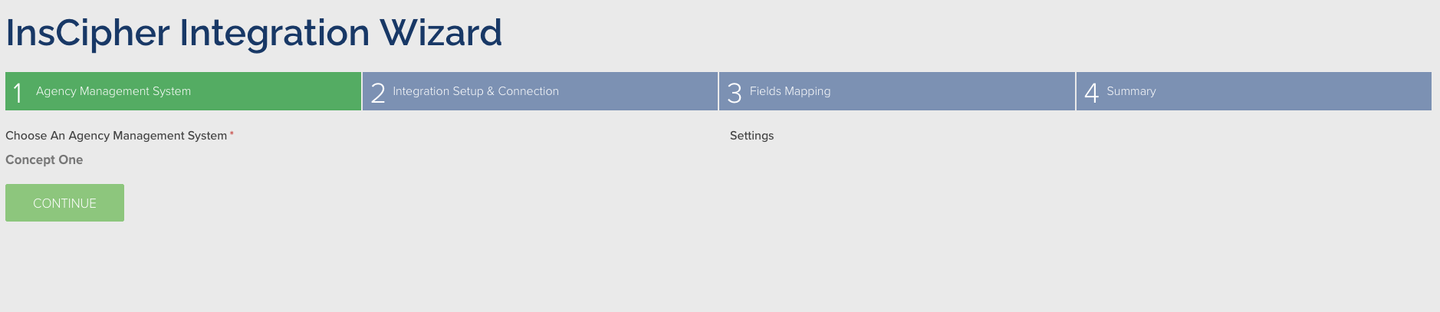
Step 1: Agency Management System
Step 1 of the Integration Tool for Concept One is generally just a confirmation of the initial setup. You can click Continue here to move into Step 2.
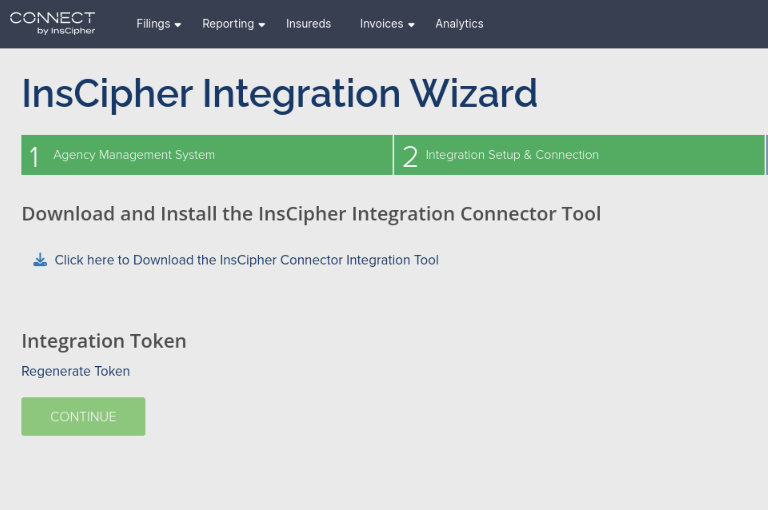
Step 2: Integration Setup & Connection
In Step 2, you'll be downloading the files necessary to initiate the Windows-based service, web view, and start the initiation of mapping for Step 3.
To start, download InsCipher Connector Tool by clicking on the link below. This will prompt you to install a .exe file, which will after being downloaded open into the browser-based user interface.
The next step is to generate a bearer token, which you can do by clicking the button under 'Integration Token' below.
Copy this bearer token value and paste it into the 'Bearer Token' field in the web view, as shown below, then click 'Save Token':
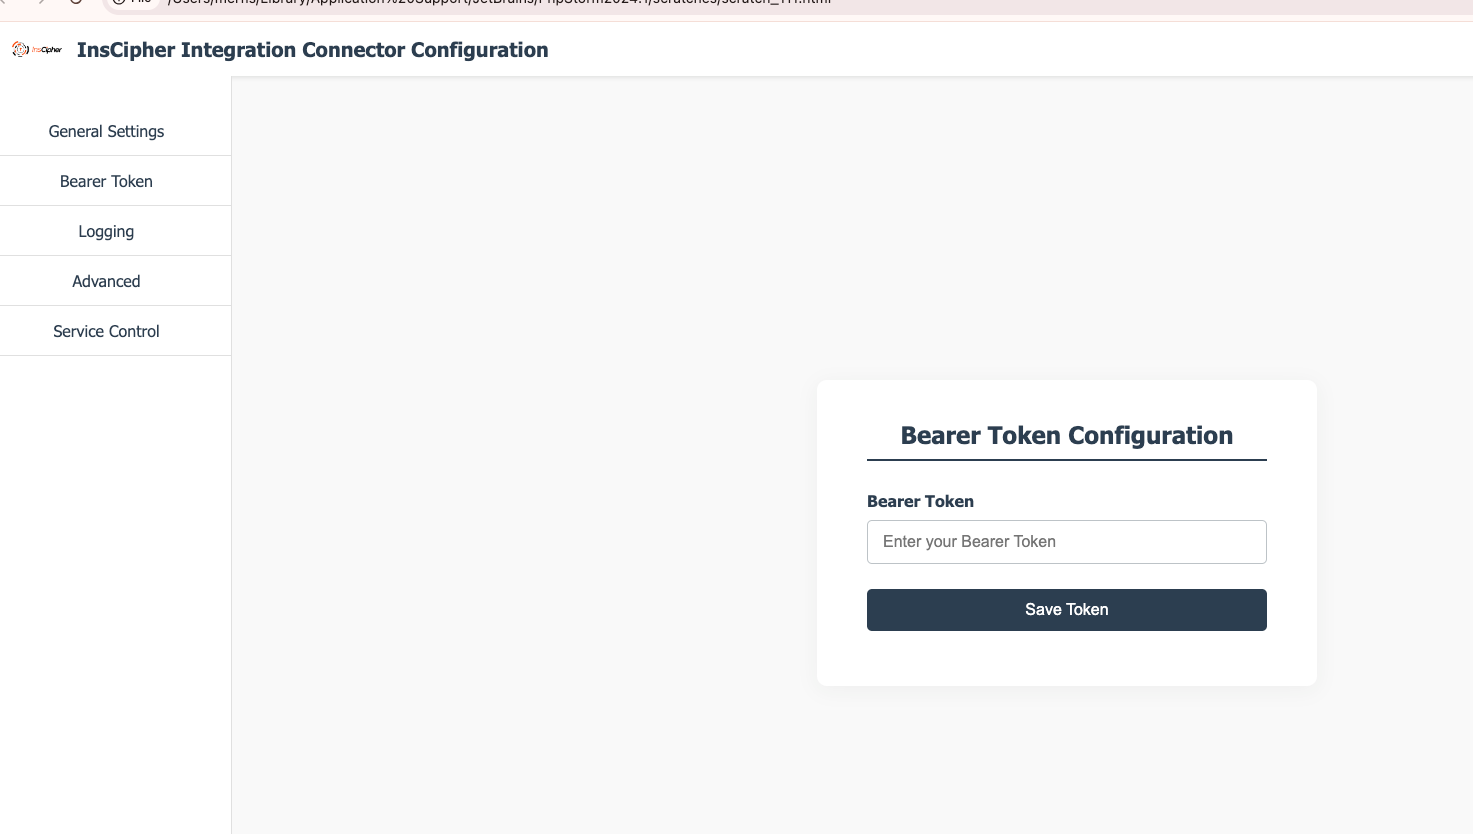
Once saved, you can move on to Step 3 as the process to start field mapping has been initiated.
Step 3: Field Mapping
Once the connection is complete and the Integration Tool is synced with InsCipher Connect®, Step 3 involves the requirement to manually map the data pulled in from your instance of Concept One by the integration tool to standard values within InsCipher to ensure data parity. The tables required to map in the Field Mapping step are:
- Agencies
- Taxes and Fees
- Lines of Business
- Filing Types
- Insurance Companies
You will need to map all of these values in order to proceed to Step 4.
Map Agencies
The first of the required sections to map involves mapping Agencies in Concept One to InsCipher (ex. shown below):
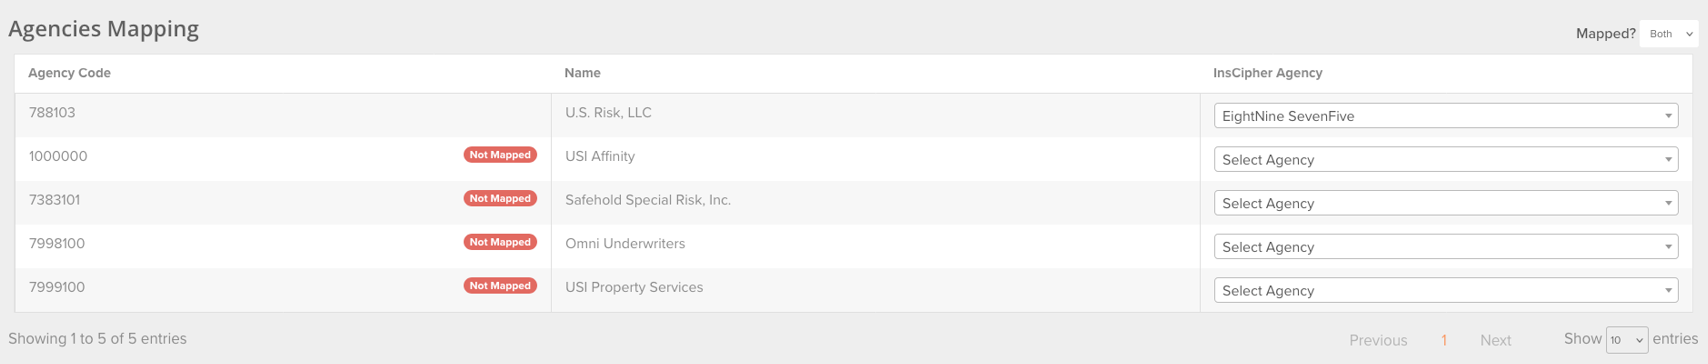
Here, the integration pulls in both Agency Code and Name for each of the fields relating to agencies within Concept One. To begin the mapping process, choose the appropriate InsCipher Agency to map the same in Concept One to.
Map Taxes and Fees
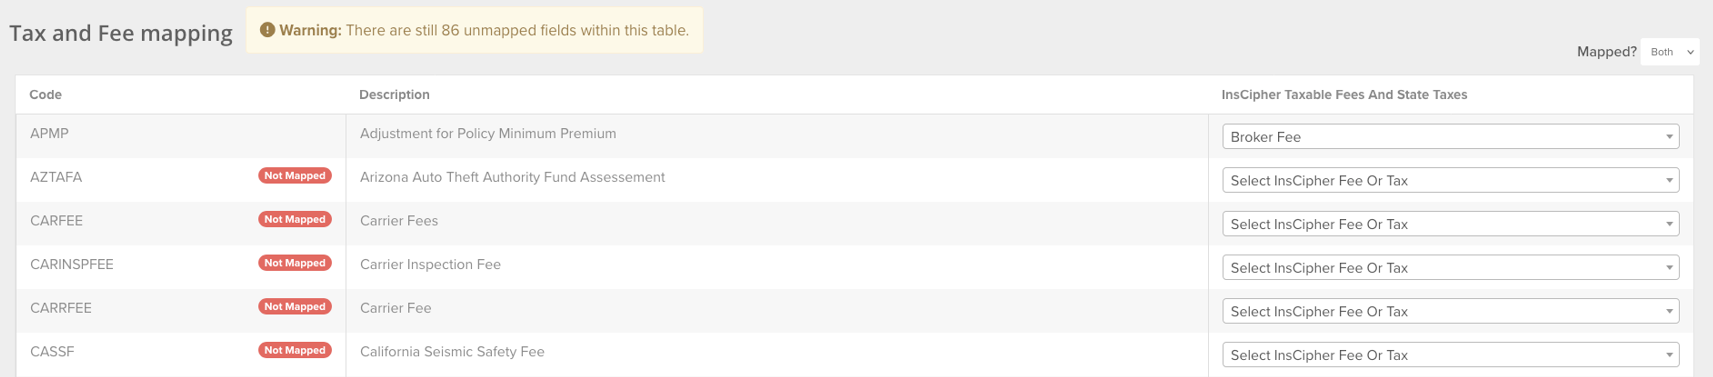
Choose one of the options per Concept One Code and Description line item to map these values to in the dropdown under InsCipher Taxable Fees and State Taxes. The mapping options are:
- Do Not Import
- Broker Fee
- Carrier Fee
- Stamping Fee
- Sl Tax
- EMPA Tax
- FM Tax
- Municipal Fee
- Sl Service Charge
Map Lines of Business (LOB)
Once you’ve mapped Taxes and Fees, move down to complete Line of Business Mapping table:
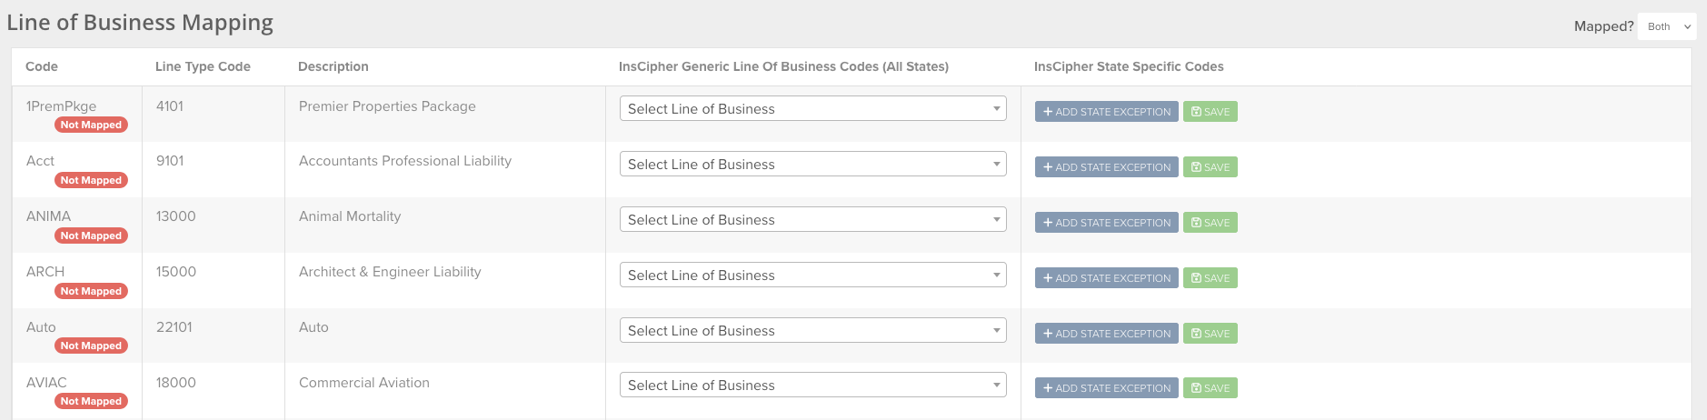
Here you’ll be asked to map the derived Concept One codes for individual Lines of Business (LOB) to an InsCipher Generic Line of Business code. You can do this using the State Specific to Generic LOB mapping worksheet or the more simplified Generic Lines of Business worksheet. If necessary, you can map specific LOB codes per AMS code under the InsCipher State Specific Codes column, where an option to select a state and LOB description are given.
Map Filing Types
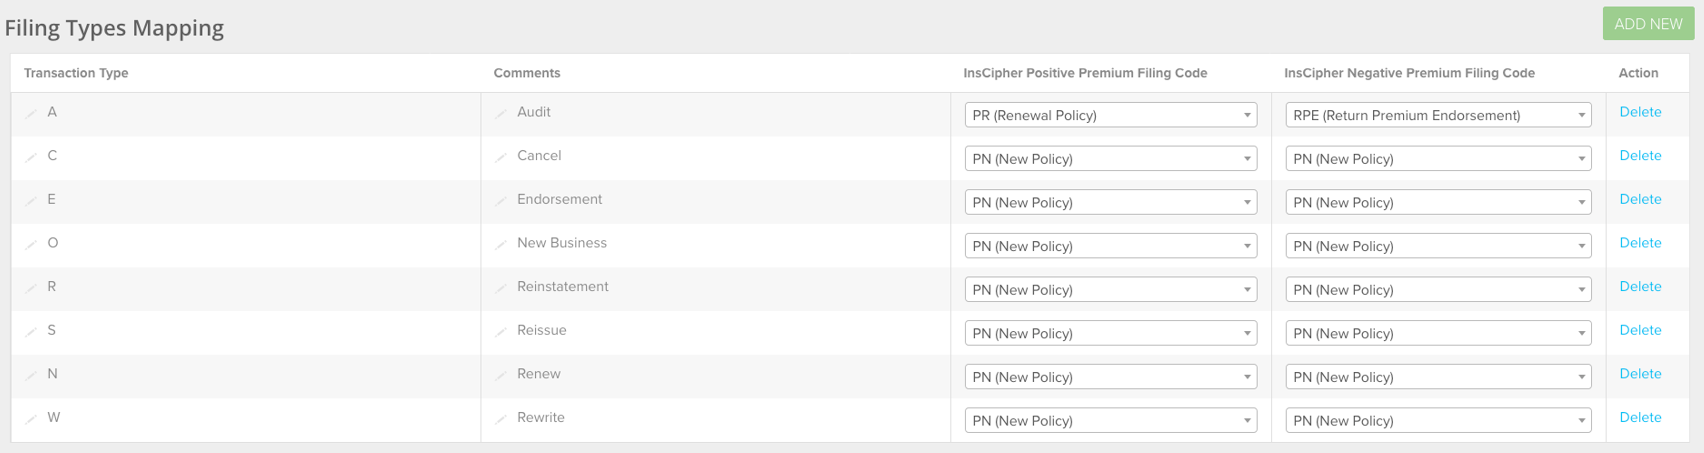
Filing or Transaction type naming and usage vary from Concept One and InsCipher. In order to ensure these are mapped correctly, custom mapping is available within the Filing Types Mapping table with the option of having a transaction type vary for positive and negative amounts to match your specific workflow.
Here, the type of transactions (in Concept One, this is referred to as Invoice Billing Class) are pulled from Concept One under the Transaction Type column along with a corresponding Description, which are listed under the column labeled Comments. Within InsCipher, this will need to translate and map to platform-defined transaction types associated with negative or positive premium as defined by the platform using the InsCipher Positive Premium Filing Code and / or Negative Premium Filing Code dropdowns. Within those dropdowns, these are the InsCipher transaction types to map to:
- PN (New Policy)
- PR (Renewal Policy)
- APE (Additional Premium Endorsement)
- RPE (Return Premium Endorsement)
- AE (Audit Endorsement)
- FC (Flat Cancellation)
- ZPE (Zero Premium Endorsement)
- PC (Pro Rata Cancellation)
- XE (Extension Endorsement)
- RI (Reinstatement)
- BO (Back-out / Reversal)
- BD (Binder)
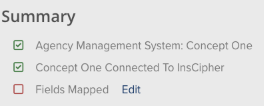
Step 4: Summary
The final step of the integration tool is a review of the Steps completed and any issues that are still outstanding. Having the following items checked as complete indicates that there are no outstanding issues with the integration:
An integration connection made during the day may only populate with policy data the next day due to the cadence of the integration. Please reach out to InsCipher support if data in the Filings Import Log is not populated promptly within the next day.
You also have the option to pull in up to two weeks of historical data from Concept One using the Trigger a Manual Import button.
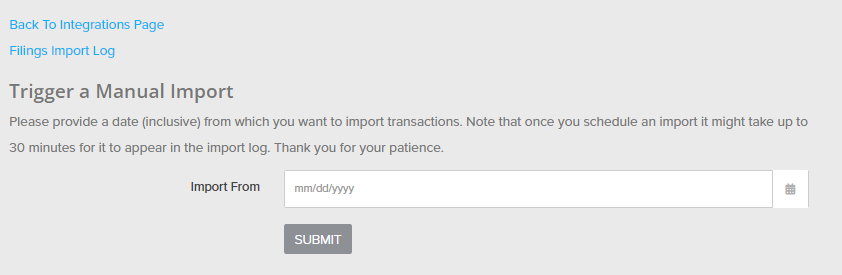
In choosing a date, you will be limited by the Import From calendar picker component to two weeks prior to the current date. Once this request is submitted, it can take up to 30 minutes for this data to appear in the Filings Import Log.
If there are errors or other issues with the status of the integration, you will see them on this page.
Updated 2 months ago